A process map is a visual model that shows how a collection of activities are sequenced together to accomplish work in an organization.
One of the great things about process mapping is that they are often intuitively understood by our stakeholders. They are also extremely powerful communication tools because they allow us to get great feedback on the process early in the requirements process.
Discover the 7 Steps to Diagram a Workflow or Process Map in the video below.
Process Map Defined
I’m Laura Brandenburg from Bridging the Gap, and today we’re going to talk about how to draw a process map in seven steps.
A process map is a visual model that shows how a collection of activities are sequenced together to accomplish work in an organization. Super simple. Other terms for a process map are process flow diagrams, workflow diagrams, swim lane diagrams, or simply a process flow, or simply a process map. Lots of different terminology often referring to the same exact technique that I’m going to show you an example of today.
Benefits of Drawing a Process Map
Now, one of the great things about process maps is they are often really intuitively understood by our stakeholders. They’re relatively easy technique to pick up as a business analyst as well, and they are super powerful communication tools.
They allow us to get feedback, really impactful feedback early in the process and before we start writing software requirements, which makes that process go so much more smoothly and easier.
They are also a really strategic technique that helps us as a business analyst discover their true problem to be solved before we dig into the details of what the software really needs to do to support the business. If you’ve been feeling like you’re kind of cut out of that early phase of the process, or not really understanding why the software or why the requirements are what they are, a great technique to pull out of your toolbox is this process map or a business process model.
7 Steps to Creating a Business Process Map
Let’s talk about the seven steps to create a process map or to draw a process map.
Step 1 – Identify the process you are mapping
Now, the first is to actually identify a process. A process captures any repeatable set of steps. It is different from a project in that a project is a set of work that needs to be completed a single time to achieve a specific result.
A process is repeatable. Look for work or activities that happen again in your organization or are a part of the repeatable work related to the software that you might be identifying requirements for. Identify what that process is.
Step 2 – Name the process map
And then you want to give it a name. This might seem like, “Laura, let’s just get to the visual modeling and start drawing it out.” That is step five. We have a little bit of pre-work to do here because I find that the pre-work really helps you get clear on what that process is and makes the visual modeling part go a lot easier. Naming your process is really important.
We teach, in our online business analysis training at Bridging the Gap, to start with a verb. So it would be, “Collect past due payments,” versus “The past due process.”
When you start with a verb, it’s much more clear and specific. I see a lot of times we see in our program participants really want to just use a broad name like, “The email management process,” or “The collections process.” But, as we’ll see in the next step, that leads to all kinds of problems and is really too vague to give you a crystal clear idea of what that process is.
Step 3 – Identify a clear start point and end point for your process
The next way to get clear on what the process is, is to identify the starting point and the ending point for the process. The most commons mistake we see in participant deliverables is that they don’t have a clear starting or ending point.
(If you’d like YOUR work to get this kind of official review, check out our flagship offering – The Business Analyst Blueprint training program.)
Visually, this leads to models that have boxes off to the side and are not integrated into the process map. So ask yourself:
- What’s the very first thing that needs to happen or the very first activity that needs to happen and what must be true before the process can start?
- And then what’s the last activity that happens? Or what signals that the process is complete?
This creates your container, your scope, what this process is.
Step 4 – Identify your purpose for the process map
And then the final piece of pre-work that you want to do is really consider what your purpose is for creating this process map.
- Are you trying to show a lot of opportunities to a high level stakeholder group?
- Are you trying to get really specific and granular with a specific team of business stakeholders?
- Is this something that will eventually be shown to your software development team as context for why they’re doing the requirements or implementing the requirements, specific requirements?
Once you understand that purpose, it’s going to help you know what level of detail to get into because you can do these process maps at various levels of detail that will give you a different view into either a really big picture process or a more specific, almost procedural level process.
Getting clear on your purpose will help drive better stakeholder engagement, which is critical to getting the details we’re going to go into next. Here’s a video with lots of tips on stakeholder engagement:
Step 5 – List or draw out a series of steps in a process map format
With that context, we are on to step five, which is to actually draw your process map. I’m going to go ahead and share an example with you because pictures speak louder than words here. What we have here is just a simple workflow diagram. This is done using swim lanes, which is a great technique to make it really clear who is doing what.
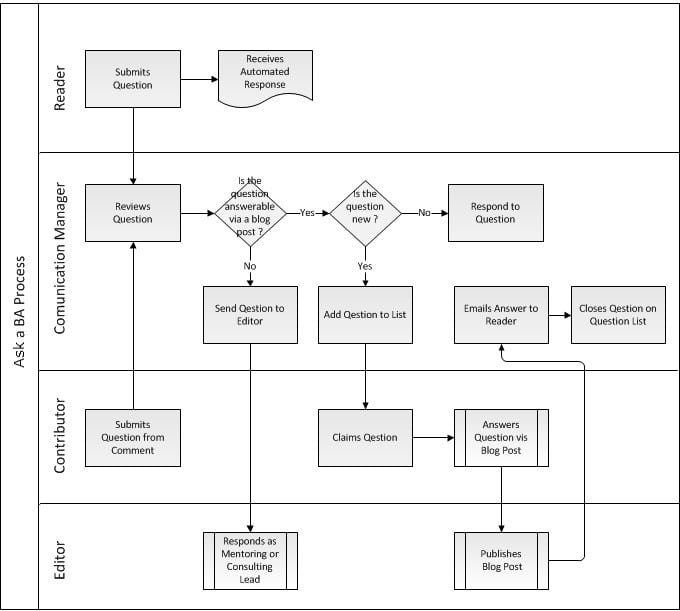
You’ll see each of these swim lanes here has a role. Contributor, communications manager, reader. That makes it really clear who’s doing what. If you’re not using swim lanes, then you need to include the clarity of who is doing what inside each of these boxes, which is your activity steps. Just using a rectangular box, really simple logic here. Simple, as often best, a lot of times is more complex, different shapes, different colors. They just confuse your model unless you are very clear and have a key for how to do them and what they mean. Here, we’re just very simple steps and no colors. It’s very clear. Each step or each box has an activity step. This would be the actual steps of your process.
Diamond is a decision diamond, so this means that there’s more than one outcome from that step. In this case, a yes answer leads to another decision diamond, a no answer leads to a specific step. That can help when there are alternative paths through your steps.
Then, finally, these little icons here are often used when there’s some sort of a creation of a document or a deliverable or an update to a database. I think the document is what they’re usually called in most tools.
And then, of course, you’ve got these arrows flowing all the way through. That is to show the flow and how the process actually flows and where it flows through.
Then the final thing I want to point out here are these activity boxes that have the little lines on them. That’s just a standard that’s used to actually represent a subprocess. That allows you to look at a high level view and to show that there’s way more detail behind this step that you’re not seeing here. You would have then a separate process flow diagram or a separate process map to show the steps in those sub processes. It just allows you to present certain information in certain ways. That’s, again, why it’s so important to know your purpose. Why are you creating this process map, and who is your audience?
Step 6 – Look for exceptions or rules to the process
You’re still not done. I’m going to go back and show that again because your next step here is to look for exceptions or rules. You might, at first, when you diagram this out, as I often recommend don’t get out a diagramming tool like this is built in, draw it out on paper. Because then you might say, well, does this step always happen the same way? And if not, that’s where you end up with these decision diagrams or decision diamonds. That, in this case, is this question answerable via a blog post? If yes, we send the blog post. If not, we do something else. We might consider it for a future blog post.
You want to look for those exceptions and those rules, and you want to ask your business stakeholders do things always happen this way? What tends to go wrong? And add that information to your model. Often it’s those exceptions and rules and alternative flows where the confusion happens. You can bring a lot of clarity, as a business analyst, by figuring out those rules and eliciting those rules from your stakeholders.
That’s step six.
Now, onto the final step. This is optional, but highly encouraged, is to create an accompanying textual business process model.
Step 7 – Why Process Maps Need Corresponding Textual Process Models
Process maps are great and they can help us get clear really quickly and kind of the overall scope of the process, but they often are not quite enough detail to fully understand a process. In our courses, we teach a corresponding textual model called the Business Process Template. We use that template and we teach that template and you can actually download that template completely for free using the link below. This helps you fully flesh out the business process to understand, to ensure that you are leveraging best practices in terminology, and that you’re actually structuring the language of each step. There’s a section in there for roles and responsibilities, so it’s really clear who was doing what.
You can upload and put your process flow or your process map into that template as part of it. It’s like the visual description of it, but the text just goes into a little bit more detail and covers some additional elements that really help bring a lot of clarity. This is really useful if you find yourself missing steps or overlooking key components of your process. Sometimes going into the textual model will help elicit that additional information and give you more questions to ask your business stakeholders to make sure that you’re really clarifying what their business process is.
Asking lots of questions is a key business analyst skill, whether you are analyzing a business process, functional requirements, or data mapping! But a lot of business analysts get stuck wondering what questions to ask. Here’s a video with a ton of guidance around figuring out what questions to ask.
So that’s it. Those are your seven steps.
And then to help you create process maps that truly improve project communication, that solve real business problems and help you move forward in your business analyst career. This is a technique that’s going to position you as a really strategic thinker and somebody who understands the business perspective, which is super, super important.
Again, feel free to download our business process template today. It’s completely complimentary.
Process maps are great because they help us get clear really quickly, but they’re often not fully detailed enough to truly understand that process. And you want to use a template like ours to get to those details.
Again, I’m Laura Brandenburg from Bridging the Gap. Thank you so much for being here. We build our profession one business analyst at a time, and success starts with you.
Download Your Free Business Process Template
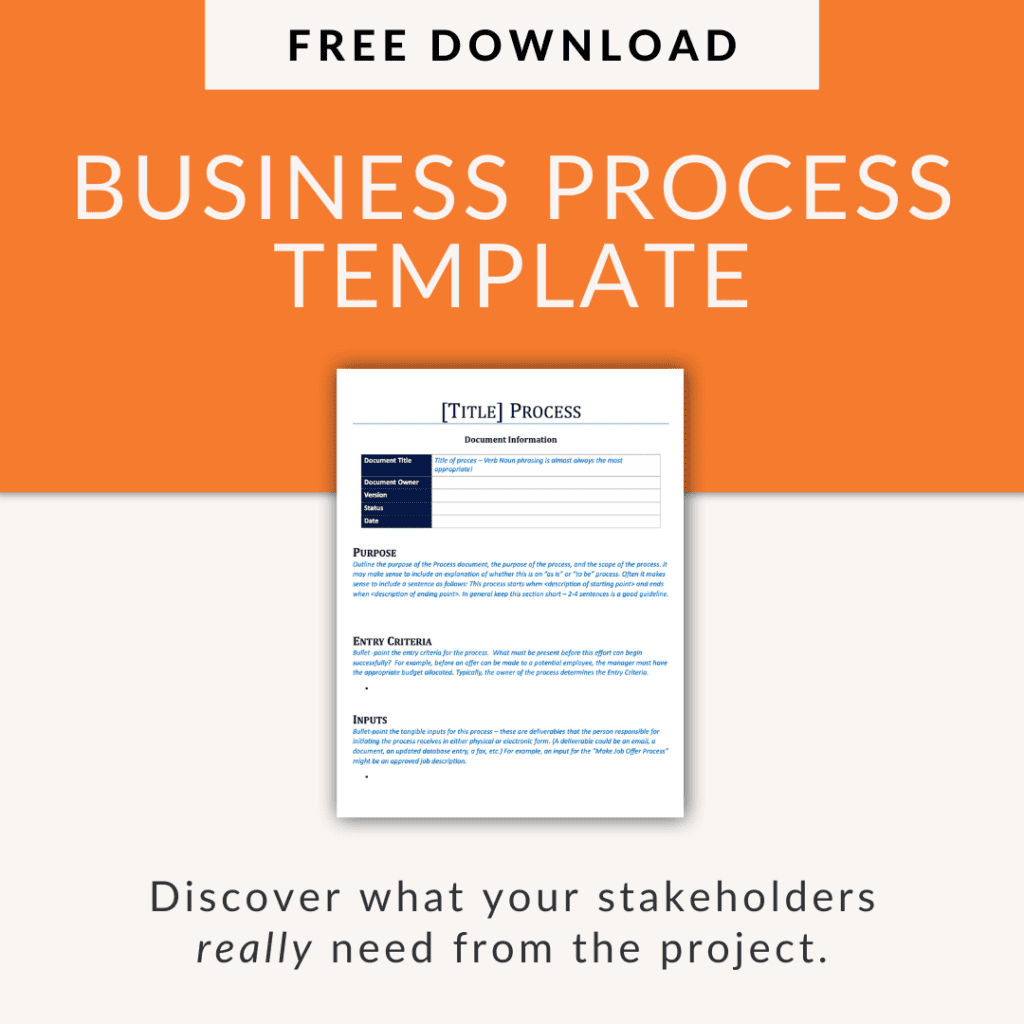 When you want to get analyzing a business process, download our Business Process template (it’s free). We want to help you get started at Bridging the Gap because that’s our mission. We build our profession one business analyst at a time. Success starts with you, and we are here to help you start your business analyst career.
You’ll discover the key elements that go into a business process model, and be able to kick-start your analysis of the business process.
>>Click here to download the Business Process Template<<
Learn More About Analyzing a Business Process
To dig deeper than a process map, and explore the full textual business process model, check out this video:
Laura;
A coupe of years ago I led a process mapping exercise for a large organization. This project involved 8 sectors of the National Office and 5 regions across Canada. We were very successful but is was a struggle, and in completing the project we learned some very valuable lessons that I have carried with me (and a great case study for the talks I give on business process modelling).
1 – capture the story – to complete the project we had to work with 25 operations people who knew nothing about process mapping. Our first big challenge was aligning the view of analysts (schema based view) with business operations people (experience based view). To do this we started by taking the schema out of play, and concentrated on capturing the story (what has to be done and who does it).
2 – Business is not always linear – much of the work flowed in a linear fashion that was easy enough to translate into process maps. There comes a point in the administration part of the process where the work becomes ad hoc, event driven and unpredictable. Force-fitting this into a linear mapping can lead to loss of credibility or loss of engagement with the clients. This was where BPMN and its approach to mapping events became a great solution.
3 – Business is not logical – I have recently been on the client side of a process mapping exercise and watched two very experienced analysts drive every business person in the room crazy by telling people that this is how you map things. I almost lost it when they mapped 3 options as decision 1:y-n – decision 2: y-n – decision 3: y-n. Stop it. People do not think that way. Business is not done through a series of logical gates. When mapping decisions, do them the way business works – 1 decision, 3 options (this is another feature of BPMN). When working with business people, think like business people not automated solutions.
Cheers
Hi Laura
I totally agree on using diagrams.
My addition/advice would be to start at the end of the process (often the trigger point), your step 3. A workflow will be triggered at some point and has to deliver something. So first find the trigger and if there is no trigger what is the point of the process? Next, who/what is/are the customer(s) of the process result and are the requirements for the end product
Now find out what steps to take from the available information in this process in order to realize the end product. And every step has to add some value to the customer, this way your workflow will stay lean.
Kind regards,
Wouter